2. Visit the Setup Server
On the upper part of the terminal screen you will see two numbers separated with a dot (x.y). In our example (see picture): 178.65
On a browser connected to the same WiFi as the terminal go to the address:
In our example: http://192.168.178.65
The initial password on the terminal server is "changeme".


3. [OPTIONAL] Define a WiFi connection
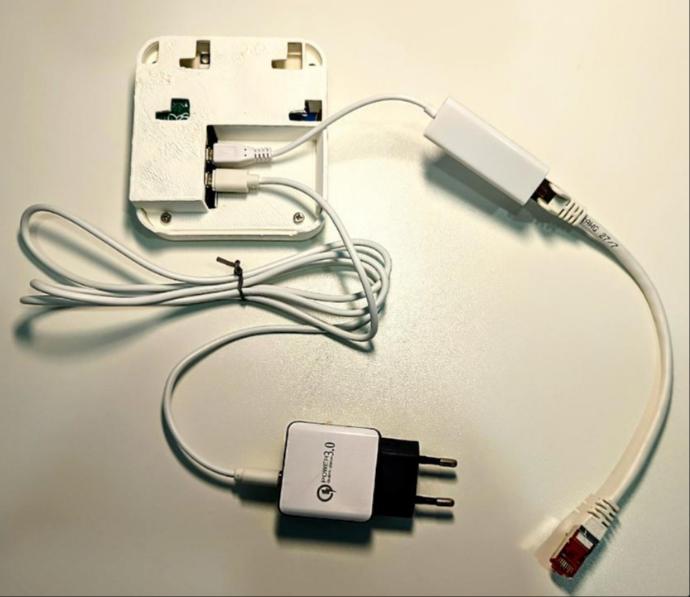
You can connect the terminal to the internet using Ethernet or you can define a WiFi connection. If you choose to define a WiFi connection, you will have to connect the device to your local network using the provided Ethernet adapter. You can connect it to your Router for example. After defining the WiFi network you will have to press "OK" on the browser and disconnect the Device from Ethernet, it will then reboot. After around two minutes, the display will show a new IP Address (for the WiFi connection).
4. Install the Odoo Modules needed
The terminal works right now (October 2022) with
Odoo 12, 13, 14 and 15.You need to install 2 OCA repositories:
1. https://github.com/OCA/hr-attendance
(for Odoo 12 you will have to install the hr module, because the hr-attendance appeared with Odoo 13) ; 1 module of this repository is required: hr_attendance_rfid ; it is recommended to also install the module hr_attendance_autoclose
2. https://github.com/OCA/iot ; 4 modules of this repository are required: iot_template_oca, iot_input_oca, iot_output_oca, and iot_oca
and one repository of thingsintouch:
3. https://github.com/thingsintouch/iot-devices ; 1 module of this repository is required: thingsintouch_ras_simplified
The device uses the template "thingsintouch.ras_simplified" (RAS Simplified Configuration for IoT).
To install all the modules you only have to type "simplified" on the Odoo Apps Search (see picture attached) and click on install on
thingsintouch_ras_simplified (RAS Simplified Configuration for IoT).
The module hr_attendance_autoclose is not necessary but it is recommended to be installed too.

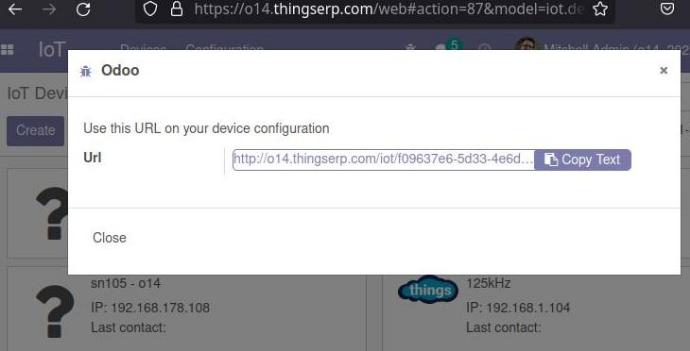
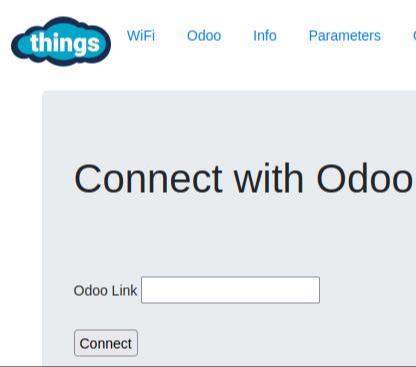
5. Get a configuration link on Odoo
Go to
IoT > Configuration > Add a new Device
and copy the link on the wizard window that will pop up. Do not close the pop up right now but later, after finishing the terminal setup.
Sometimes the link that the wizard shows uses "http" instead of "https". If you find that your link does not work. please change it to "https" accordingly.